
Can a Fine-Art Large-Format Photographer
Find Happiness With a $30,000 Scanner?
By Bill Glickman
Drum Scanners Vs. CCD Scanners Is It Worth it?
“To drum scan, or not to drum scan“, is the question I hear often from photographers. I made my decision to buy a drum scanner and have now been using it for almost a year. With this article I will share some of my experiences. This is being written from a photographer’s point of view, rather than that of a service bureau operator, and is mainly concerned with scanning film, not reflective materials. And, although drum scanners can scan negative film, it seems that there are problems with color casts. I am told though that with ICC profiling systems in the hands of a knowledgeable person this can supposedly accommodated. However, this article is based on my personal experience with scanning color transparency material, not negative film.
Although flatbed CCD scanners have come a long way in the past few years, in head-to-head comparison they are no rival for a good drum scanner. However, as this article will explain,in certain cases, flatbeds can rival a good drum scanner. The key is to first clearly define your objectives in your scanning. Then, becomes much easier to understand what products and services are best foryourneeds. Lets explore the pros and cons of each.
The Benefits of Drum Scanning
Resolution:
Drum scanners rule the resolution war, plain and simple. Good drum scanners can resolve 8,000ƒ¸ 11,000 dpi optically. But, is all this resolution worth it? The best answer is, “sometimes“, It all is dependent on the enlargement factor one is imposing on the item being scanned.
For example, if you are scanning a 35mm transparency and want a 24×30” final print, and you are printing to an Epson printer that produces its best quality at 360 dpi, then the enlargement factor of 24x at 360 dpi = a 8,640 dpi scan. There are no flatbeds I am aware of that can scan at resolutions this high. The new high end flatbeds such as theCezanneandJazzrange from about 1500 to 5400 dpi; not bad, but a unit that can optically scan at 5,400 dpi is priced around$55,000, so don’t always think that flatbeds are a cheaper alternative to drum scanning.
Wet Mounting:
One thing I have learned the hard way is thatwet mountingis mandatory for the best scan. All film have small scratches and dust that appear exaggerated when scanning for big enlargement factors. Most scanner makers advise that anything in excess of 2x or 3x enlargement factor be wet mounted Vs. dry mounted. In addition toNewton Ringsthe detail of the scan is much more obvious under a wet mount.
A wet mount consist of placing a mounting fluid between the film and the drum (which is shaped like a cylinder made out of a highly translucent plastic-like material) , and between the film and a piece of clear acetate that is placed over the film. The wet fluid forms a wet-seal between the top and bottom surface of the film. Just looking at this wet-seal over a light box, one can clearly see the improved clarity of the film Vs. looking at film on a light-box without a wet mount. In addition to removing scratches and dust, wet mounts also blend film grain to make it unnoticeable.
This can happen even if film is not enlarged a great deal. Even film likeProvia F(the least grainy of film of all) can show grain even in small enlargements. This occurs as a result of overexposures and certain colors that cause the film to display grain under lower than expected magnifications. If you want to see a final wet mount scan Vs. a dry mount scan of the same image, then look here. The differences are quite noticeable.
Most drum scanners in the past used a oil based mounting fluid. Fortunately I learned of a non-oil based product made by Kamiwhich is alcohol-like in consistency. It is very easy to work with Vs. oil-based mounting fluid. This was a major breakthrough in time savings for both mounting and clean up.
Dmax and Dmin :
Without getting into any debates on the subject, scanner makers each rate their scanners on how much latitude the scanner can produce. Drum scanners seem to always outshine most flat-bed CCD scanners in this area. And, I do not want to leave out the fabulous Imacon FlexTight scanners which are not flat beds, and in a class of their own.
The reason I do not like discussing this is that their seems to be no readily available test for the average consumer to determine these values, and there is no single unbiased testing laboratory that publishes these values from their own tests. So therefore the makers of the scanners publish their own values and never seem to be confirmed / denied by any unbiased third parties. So it seems that every scanner is starting to claim values like 3.9, 4.0, 4.1 and some even 4.2, even though the theoretical 4.0 is the highest value possible.
I have not gotten a good explanation of this from anyone. In the actual scan these differences will mainly surface in shadow detail. The best way to determine this before buying a scanner is take a transparency that has a very wide latitude of shadow to highlights and compare the scanner you want to buy Vs. a good drum scanner. If the difference is marginal but the price difference is substantial, then you have the answer you need to make an intelligent choice based on you needs.
Bit Depth:
Bit depth is the number of colors a scanner can capture. And although good drum scanners have 16 bits per channel input for a total of 48 bits, this is not that useful if you bring the file into PhotoShopwhere it immediately gets compressed to 8 bit channels. However, if the file was intended to go to an output that would take advantage of this extra bit depth, such as a film recorder, then this would probably make a good bit of difference.
I have not tried this myself. From most articles I read it still pays to capture the original file with greater bit depth even if it will be compressed in PhotoShop. The reason lies in how PhotoShop compresses the file, Bottom line; if Photoshop compresses the file from a higher bit depth file it will more accurately place the colors where they should be in the 16 bit depth file Vs. the file that was scanned at 8 bit depth from the start. Once again, if one thinks this is an issue when buying a scanner, try both and compare the outputs of the prints.
Work Flow :
Drum scanners are designed for high volume. So the combination of software, drum mounting stations and extra drums is designed to increase production dramatically. Most drum scanner software is designed to coordinate several tasks at once. For example, I can be doing a final 500 MB scan on one file while setting exposure values and saturation levels on another file. When I am done, I simply put this file in the queue for final scanning, it gets in line and waits its turn. When I am done, and waiting for a scans to finish on one drum, I can prepare my film mounting on a spare drum. This is usually performed on a drum mounting station. It’s a custom-made device that holds the drums so that one can easily mount the film and acetate.
When the drum in the scanner is finished, you simply remove the drum and install the next drum. So all aspects of work flow is easily accommodated by the workstation, extra drums and software. Even though a 500 MB scan may take 35 minutes, it does not tie-up the scanner, since you can be doing so many other tasks that need to be completed before putting your next drum in the scanner. There is no waiting around for the scanner to finish.
The Drawbacks:
Price! A new drum scanner costs on the low end, $16,000 (4000 dpi) and on the high end (11,000 dpi) about $65,000. This usually does not include the drums, ($1500 – $2500 each), drum mounting stations ($1500 – $3000) , or software ($1500 – $4000). So when you add it all up, it gets expensive Vs. lower-end flat bed scanners.
The good news is, a good few year old used unit can be purchased very inexpensively, and these machines are tanks, and are fairly reliable. A used scanner with warranty and support can be purchased for about 40% – 60% of the new values. So if youneeddrum scans, and have a lot of film to scan, owning a drum scanner can pay for itself very quickly.
Labs seem to charge very high prices for drum scanning. For example, 4×5″ wet-mount scans at about 300MB cost between $70 and $130 each depending on the lab, their equipment and the expertise of the operators. Do the math and figure when your payback would be. For me, it was less than 2 years.
Size:
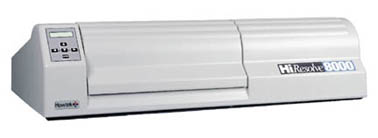
Drum scanners are large beasts. Mine takes up about a 2 ft x 4 ft area, plus the drum mounting station has about a 4 sq ft footprint. So you’d better have room to do all this. You also need a very strong table or support system as the scanners weigh in at 150 lbs, some over 200 lbs. And they operate at high speeds, like 1600 RPM, so vibration can disturb anything in the vicinity of the scanner. Here is a look at the scanner I own, the Howtek Hi Resolve 8000.
Speed :
Drum scanning takes a long time. Each step seems to add up; cleaning and examining the film, cleaning the drum, wet mounting the film to the drum, previewing the scans, touching up the scans, and then performing the final scan. It is time-consuming, but like everything else, you get out what you put in. Never underestimate how much time it takes to wet-mount film to a drum. It is a very tedious process getting the film straight and the acetate cover fully sealed to the drum to prevent fluid from spitting out when the drum is in the scanner and moving at speeds of 1600 RPM. Also, sometimes the speed of the drum will move air bubbles into the film area, in which case you need to re-mount and start over!
Mess:
Although with the new mounting fluids and cleaners the process is much improved over the older methods and products, you’ll still have chemicals all over, drum cleaner, mounting fluid, film cleaner, scratch remover, etc. So your hands are wet, the chemicals smell a bit, they drip all over… it’s just abitmessy compared to placing a chrome on a flat-bed. But as you can see from the wet mount-Vs. dry-mount link above, it sure does make a difference.
Support:
Drum scanners are not mass-produced items. Therefore the software and the support systems are not like calling an 800 number with mass produced flatbeds. Tech-support sometimes tries to figure out problems as they go along. Hopefully the scanner does not need to be sent back, since the freight is outrageous on these beasts. Most weight between 150ƒ¸ 200 lbs. Repairs are usually performed on site. I would not recommend buying a used drum scanner without prior knowledge of where support will come from. Unless you are already a knowledgeable scanner operator, you will need support, and possibly training.
Image size:
Most all drum scanners will only scan film up to about 8×10″. There is a few drum scanners, like the Howtek Grand,that will scan up to 11 x 24″, but these units are not sold often. The point is that many flatbeds have much larger scanning areas, which is necessary if one is scanning either 11×14″ film or large reflective prints.
Final Thoughts:
Drum scanners are a major commitment to your art. They are serious machines that have steep learning curves. Most makers offer classes for $2ƒ¸ $3k just to learn how to use and perfect your scans. The advantages are many as mentioned above. However the drawbacks are also many. Each person must evaluate for themselves what would be best for their requirements.
I personally am very happy with myHowtek Hi Resolve 8000scanner. It enables full control of my art right from the film to the final print. This is very important to me. In addition the cost of scanning at labs would have been exorbitant for me. There is unfortunately no easy way of comparing scanners short of doing tests yourself. Although this is cumbersome, it is sure worth the effort before making such a large investment in a machine you will probably own for many years.
Even though I own a drum scanner I would clearly like to share the following story, showing how good low-end flatbeds can be. Before buying this scanner, I had a dealer send me prints made on anEpsonprinter from the same transparency, one was scanned with a $2,500Agfa DuoScan, one from anImacon FlexTight $14,000 CCD scanner, and the last was made by anICGdrum scanner, one of the most expensive made at $65,000.
The chrome that was scanned was of good quality and did not have a very large exposure latitude, probably 2.5 stops. The prints were only on 8×10″ paper and since the chrome was on 6x7cm all the scanners could easily handle the dpi required with no interpolation at approximately 1500 dpi.
So what was the results? I have to admit, I was quite shocked. When looking at all three prints I could see slight differences in color gamut, but not sharpness. I concluded that none of the prints looked better than the others and any of these color differences, which were slight, could have been easily been corrected in PhotoShop. OK, I had to place my bets on which was which, so I placed them in 1,2,3 order with the best being in first place. When I turned them over and looked at their ID, the order I placed them in was,Imacon,Agfa, ICG. Go figure, right? But when associates were asked the same question, they picked different orders, so this is how I concluded that none of them looked better than the others, just a bit different.
But keep in mind, this was an ideal arrangement where the transparency fit perfectly within the operating capabilities ofallthe scanners. But it sure goes to show you, that unless you get a magnifying glass out on the final print, you would be hard pressed to tell the difference between a $2,500 scanner and a $65,000 scanner if the item scanned is of good quality and the requirements are within the scanners capabilities.
What seems to be a good compromise for most people is as follows. But a low-end flatbed that fully meets the requirements of 70-80% of your scanning work. This will enable you to do a lot of your own work while saving money and controlling the entire process of scanning and printing. Then for the remainder of the work that requires more scanning horsepower to meet your requirements, outsource for drum scans for those special images. This way you will be maximizing your scanning dollars and saving yourself the hardship of drum scanning when it is not required for a majority of your work. There are also some shops that will allow people to rent their drum scanner for the day. Once you learn to use it, this can be another opportunity to reduce your costs on drum scans. Prices that I have heard range from $500 – $1,000 per day. Sounds high, but if you do 30 4×5″ scans in one day, it would have cost you about $3,000 to have the lab to do the scans. Substantial savings indeed. Of course with MF or 35mm, you can scan many more than 30 per day.
I hope this review gives new-comers to high-end scanning a better insight into how best to approach their scanning needs. Best of luck!.
This review was written by Bill Glickman, a Las Vegas based large-format landscape photographer. All Rights Reserved.
Copyright 2000, Bill Glickman
Lorem ipsum dolor sit amet, consectetur adipiscing elit, sed do eiusmod tempor incididunt ut labore et dolore magna aliqua. Ut enim ad minim veniam, quis nostrud exercitation ullamco laboris nisi ut aliquip ex ea commodo consequat. Duis aute irure dolor in reprehenderit in voluptate velit esse cillum dolore eu fugiat nulla pariatur. Excepteur sint occaecat cupidatat non proident, sunt in culpa qui officia deserunt mollit anim id est laborum.
Lorem ipsum dolor sit amet, consectetur adipiscing elit, sed do eiusmod tempor incididunt ut labore et dolore magna aliqua. Ut enim ad minim veniam, quis nostrud exercitation ullamco laboris nisi ut aliquip ex ea commodo consequat. Duis aute irure dolor in reprehenderit in voluptate velit esse cillum dolore eu fugiat nulla pariatur. Excepteur sint occaecat cupidatat non proident, sunt in culpa qui officia deserunt mollit anim id est laborum.
Lorem ipsum dolor sit amet, consectetur adipiscing elit, sed do eiusmod tempor incididunt ut labore et dolore magna aliqua. Ut enim ad minim veniam, quis nostrud exercitation ullamco laboris nisi ut aliquip ex ea commodo consequat. Duis aute irure dolor in reprehenderit in voluptate velit esse cillum dolore eu fugiat nulla pariatur. Excepteur sint occaecat cupidatat non proident, sunt in culpa qui officia deserunt mollit anim id est laborum.
Lorem ipsum dolor sit amet, consectetur adipiscing elit, sed do eiusmod tempor incididunt ut labore et dolore magna aliqua. Ut enim ad minim veniam, quis nostrud exercitation ullamco laboris nisi ut aliquip ex ea commodo consequat. Duis aute irure dolor in reprehenderit in voluptate velit esse cillum dolore eu fugiat nulla pariatur. Excepteur sint occaecat cupidatat non proident, sunt in culpa qui officia deserunt mollit anim id est laborum.
Michael Reichmann is the founder of the Luminous Landscape. Michael passed away in May 2016. Since its inception in 1999 LuLa has become the world's largest site devoted to the art, craft, and technology of photography. Each month more than one million people from every country on the globe visit LuLa.
You May Also Enjoy...
Red Dragon
This photograph was not taken on Mars, nor was it manipulated in any way in Photoshop.It is essentially a straight record of one of the
Zoo-Video
Animal PhotographyAt The Zoo (D30) From Issue #1 Click on the image below to play a briefQuicktimevideo clip from Issue #1 of theVideo Journal.
