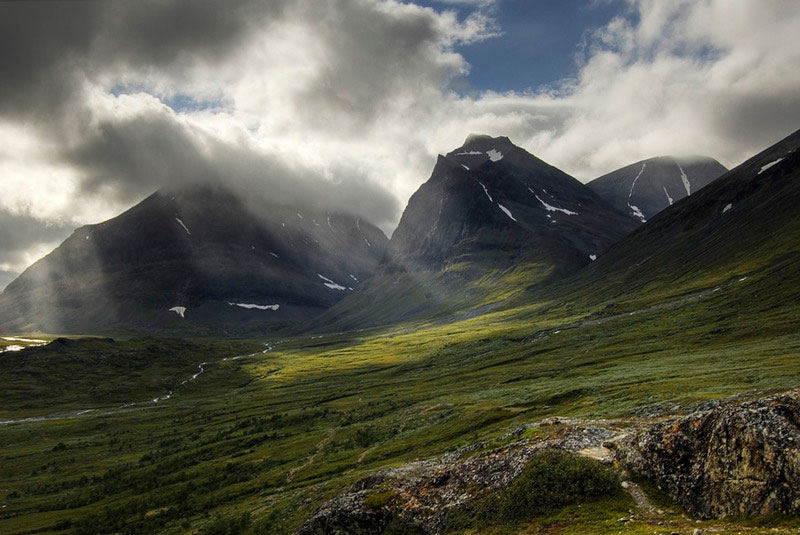
Mt Kebnekaise, the highest mountain of Sweden, in Lappland
Recently, the results of the UK Landscape Photographer of the Year Award were published. BBC News made an announcement on theirwebsite, and a very interesting thing happened. Most of thereaders commentswere not praising the winning images but complaining about one thing: they looked like “HDR”. By that, they meant overly contrasted and saturated images that appear unrealistic (on a sidenote, I am fairly sure that only one of the eight winning photos actually was HDR).
The technique has indeed a very bad press, especially in the “fine art” community, and to be fair, much of the criticism is justified. But the point I would like to make here is that, well used, it can be very powerful and look perfectly natural, and is sometimes the only way to capture a scene as our eyes see it. Because there are so many widespread misconceptions about HDR, and because most online resources focus on how to achieve this overcooked effect that so many of us hate, I would like to briefly make myself its advocate. Do not expect a detailed tutorial but rather a general presentation of the technique.
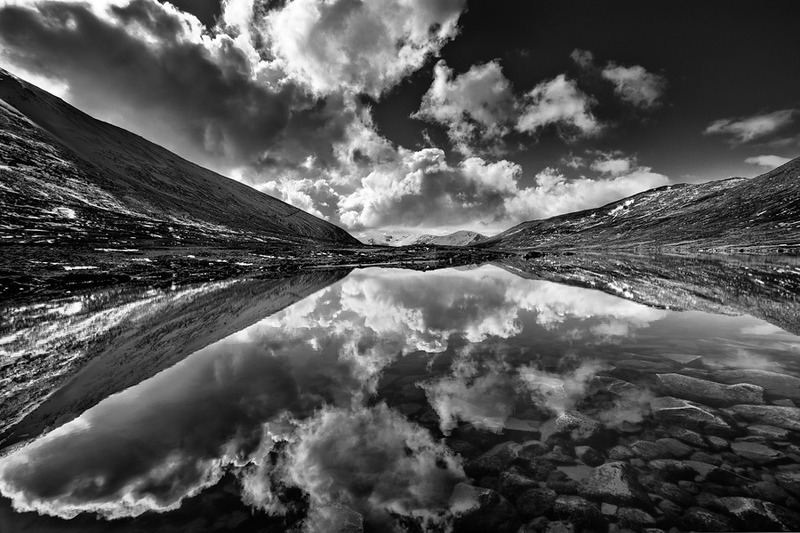
Reflections of Ben Nevis on midway Loch, Scotland
What It Is
HDR stands for High Dynamic Range, and refers to a post-processing method which allows to dramatically increase the dynamic range of a photograph (duh!) by merging different exposures of a same scene. Though the idea is not new, the technique has quickly caught on after new algorithms for the critical tone mapping operation (cramming the increased brightness range into something that a screen or a print can display) were developed a few years ago. HDR is also used a lot in video games as they allow to render a same scene under a variety of lighting conditions, but we will here only discuss the applications to photography.
One way to think of HDR is as a glorified neutral density filter. On a scene where the contrast is so intense thatbothhighlights record as pure white and shadows as pure black (i.e. where the dynamic range of the sensor is too low to properly record the scene), its effect will be to darken highlights and brighten shadows so that details can be retained in each area. Two of its advantages over tradition ND filters are that it is a post-processing technique, necessitating no additional gear at capture time, and that the border between the darkened and the brightened areas can be much more complex than a simple straight line.
To create an HDR image, one needs a set of bracketed images (i.e. of captures of the same scene with different exposure compensations) and dedicated software. There are many on the market, including Photoshop since CS3, but the current leader is undoubtedlyPhotomatix Pro, from HDRSoft. In a first step, the different images will be aligned and merged into a single .hdr file. However, this image cannot be rendered on the limited devices that screens or printers are, and the second step will be to reduce the contrast through tone mapping. It can then be manipulated normally, for instance with photoshop.
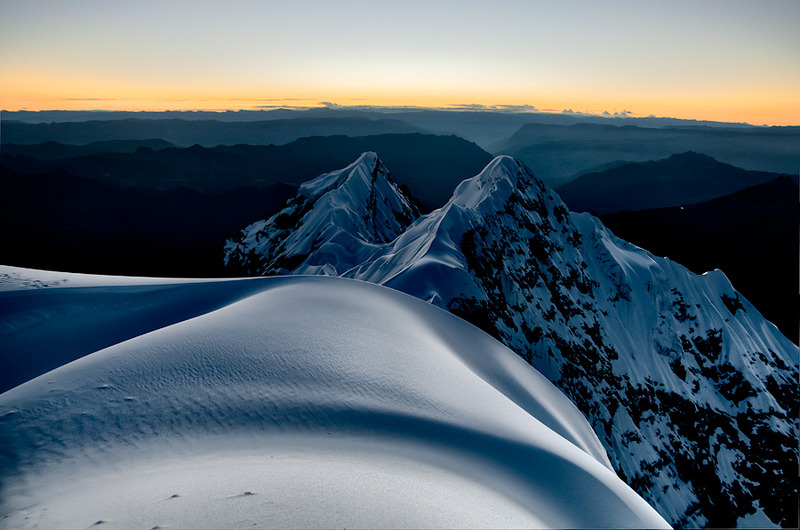
Sunrise on the summit of Nevado Yannapaccha, 5460m, Cordillera Blanca, Peru
Some wrong ideas
* HDR always looks fake
If you remember only one thing from this article, let it be this:HDR doesn’t have to look artificial.
Let me illustrate my point. Of the following three pictures, only one has been produced with the help of HDR. Can you guess which one?
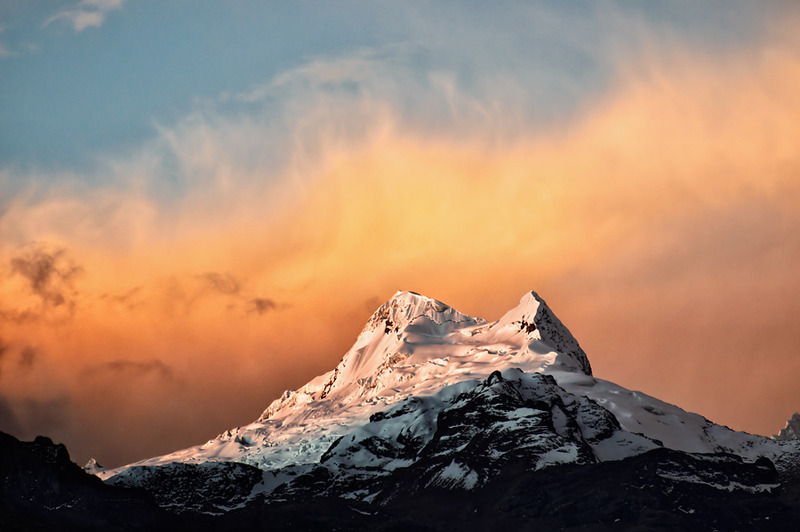
Nevado Vallunaraju at sunset, Cordillera Blanca, Peru
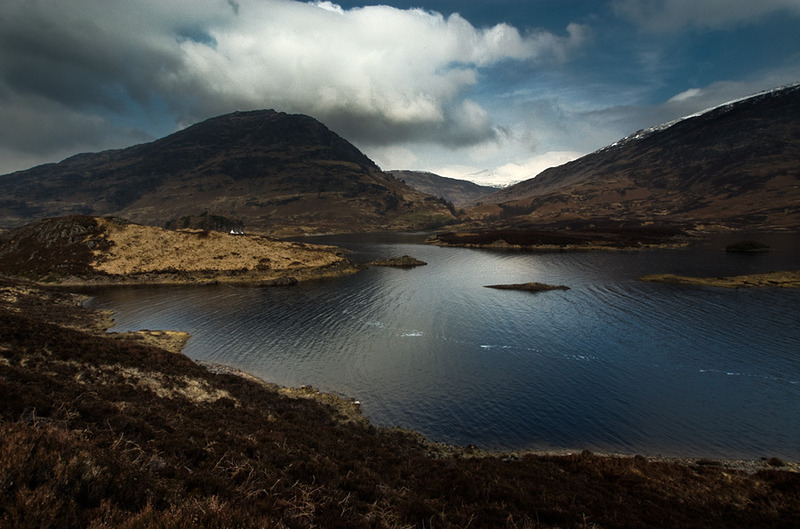
Loch Treig, Corrour, Scotland
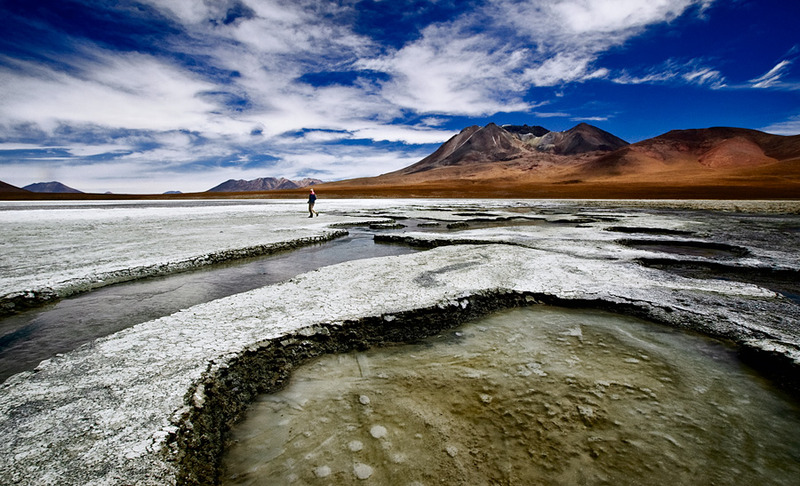
Sur Lipez desert, Bolivia
If you guessed the second image, from Scotland, then you are right. But I hope that even if you found it out, you will agree with me that it is not an image that screams “fake”. Light is even and contrast on the low side (at least compared to the other two images). If you are not yet convinced, I invite you to look at the other images on this page, as all are HDR.
The problem with HDR is thatby default, it looks artificial and ugly, and it takes some work to bring it back to something believable. Though knowing how to achieve that result mostly comes with practice, there is one important trick that I should mention here: you should never try to obtain the final look of an image in the tone mapping phase, and instead just focus on bringing all the details back from shadows and highlights. You should aim for a low contrast (especially local contrast), low saturation image at this stage, and only afterward, in Photoshop and with local curves adjustments, bring back the full glory of the scene. In the second part of this article, I describe some common traps that you want to avoid when processing an HDR image.
You need a tripod
From time to time, I hear photographers say “I was in front of this great scene and wished that I could have shot for HDR, but I didn’t have my tripod with me“. Since you will be bracketing, it is true that you will want to stay as stable as possible between shots, and a tripod definitely helps with that, but as long as your camera has an auto-bracketing function and a burst mode, which I believe is, in 2009, the case of all DSLRs and most high-end point and shoots, then you should be just fine. All you will be doing in the small amount of time between shots is shifting or rotating the camera a little bit, and software has gotten very good at correcting those and realigning the images. I personally use the “auto-align layers” functionality of photoshop, available since CS3, and this has never been a problem. Not a single one of the images presented here has been shot on a tripod.
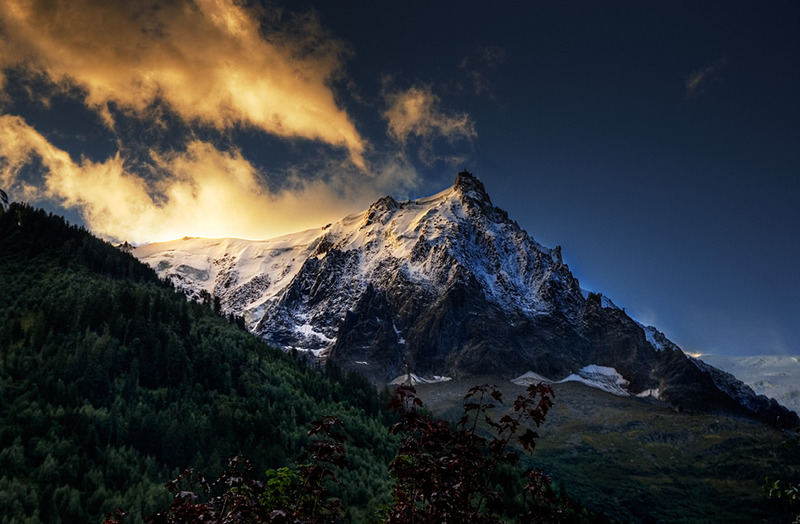
Aiguille du Midi seen from Chamonix after a storm, France
Whatisa problem is elements moving in the frame independently of each other. With careful masking and cloning (assuming your religious beliefs are compatible with those), it is generally possible to fix the movement of someone walking, but vegetation in the wind is every HDR photographer’s worst nightmare. Unfortunately, using a tripod won’t be any help.
Two things to note, however, if you bracket handheld. First, you will lose a few pixels on every side when realigning the images, so shoot a little wider than what you want to end up with and be careful not to position subjects too close to the edges. Secondly, the way bracketing works is by modifying the shutter speed (if it touched aperture, then it would modify depth of field, which is not what we want), which means that the overexposed shot will be taken with a significantly slower shutter speed than what you started with. It is therefore essential to check the sharpness of this image as soon as you have taken it, or you could be in for a very bad surprise when you get back home.
You can use HDR in any situation
One thing to keep in mind is that the very principle of HDR is toreducethe contrast of a scene whose dynamic range exceeds that of the camera sensor. Since by the nature of what we are photographing, the end result still usually shows a lot of contrast, it is a common misconception that you can use HDR to increase the contrast of a scene. This is not true. All you will manage to do if you apply HDR techniques (in particular tone mapping) to a scene that doesn’t require it is to increase local contrast, giving it this much decried fake look.
Processing an HDR image is so time consuming that I will always try to avoid it as much as possible. If you can nail an exposure with enough details, then processing it in HDR (especially if you start from a single raw file, as sometimes advocated on various internet tutorials) will bring no good.
There is always an alternative to HDR
Again, I wish it was the case, as it would save me a lot of time on the computer. ND filters are sometimes an answer, assuming that you go through the pain of carrying them in the field, but if the transition between highlights and shadows is any more complicated than a flat horizon line, then they won’t be much help. Sometimes, it is also ok to sacrifice details, especially in the shadows, but if not, then HDR will be theonlysolution to save the shot.

Abandoned truck in the Uyuni salt flat of Bolivia. Good luck using a ND filter to expose this one properly…
HDR is automatic
Another thing I hear quite often is the idea that “you just load your images in the software, press a button, and that’s it“. While one could argue that there would actually be nothing wrong with that (the whole craft vs art debate, which I won’t get into), it isn’t even true to start with. If you try to process HDR images like that, keeping everything at its default settings, then you will end up with an awful artificial looking image. Getting HDR right is as much of a technique to learn as anything else in photography. Anyone who argues otherwise obviously never tried using the technique.
What you want to avoid
Here is a list of things to be on the lookout for when you process your images. Avoid those and no one should bother you about whether your image is HDR or not.
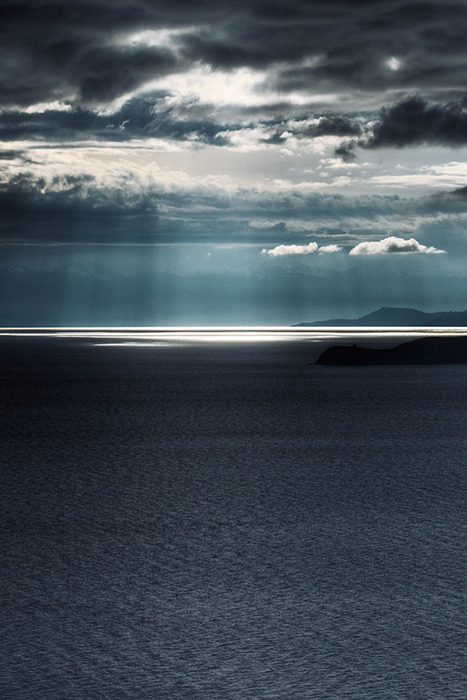
Sunrise on lake Titicaca, Bolivia
Halos
A signature of any method to decrease contrast in bracketed images, those appear whenever a dark and a bright zone are very close to each other, and especially on the edges of mountains on the skyline. They most frequently show in the bright areas but can also hide in shadows. You will need to get those right in the tone mapping process, often by reducing micro-contrast. If nothing else will do, then careful cloning can save the day, but it can be difficult and time consuming, and should be kept as a last resort solution.
Ghosts
Whenever some element in your composition moves between frames, there is a good chance that it will show as a ghost figure, since the tone mapping algorithm will mix a little bit of each image to reach its final result. Software has gotten a bit better at handling those, but it is still one of the worst things that can happen. If the ghost is simple enough, it is sometimes possible to use one of the bracketed images on another layer and clone/mask the ghost out, but be prepared for spending a lot of time looking at your image at 300%. Vegetation is hopeless, and I won’t even bother bracketing anymore if there are both leaves and wind at the same time. HDR is mainly a technique for static subjects.
Inverted contrast
What HDR really does is reduce the brightness of highlights and increase the one of shadows. But if you take the process too far, you can obtain a situation where two neighbouring zones have inverted which one should be brighter than the other. This usually looks very, very ugly (if you haven’t seen it before, open any image in photoshop and apply a strong inverted S curve on luminosity, then try not to throw up). More generally, it is a good idea to try and keep track on what parts of the image should be brighter than others, and verify that your tone mapped image still respects it, as a sanity check. If the sky is darker than the mountains, something is probably very wrong.
One of my earliest attempts at HDR, showing some defects: inverted contrast (in the clouds) and ghosts (in the transition between stones and water).
I also sacrificed shadow details on the left hill to avoid halos in the sky.
Noise
By its very nature, HDR processing will significantly increase noise, especially in the shadows. One way to limit it is to ask the tone mapping software to output an image slightly overexposed, but be prepared for the need of using noise reduction plugins.
Excessive saturation
The scenes we do HDR for are usually very contrasty, so they should also be very saturated, right? Well, not necessarily, no. Also, for some reason, the saturation applied by the tone mapping software seems much more artificial than the one you can get via photoshop. One rule of thumb is to fix saturation as the last step in the processing, just before final sharpening.
Excessive contrast
This is a hard one, and it can be difficult to draw the line and decide what is too much. As said before, though, contrast should not be gained in the tone mapping stage but later, once back on a LDR image inside photoshop. You will have to trust your eye and your memory of the scene. Does it really correspond to your memory of what you saw (and what you felt)? If you were seeing the image for the first time, would your first reaction be “wow, this is beautiful” or “wow, someone had fun with photoshop“?
In conclusion
My only hope that this brief article will make you want to try out HDR next time you are in front of this gorgeous sky with a hopeless histogram. Expect a lot of frustration, but it is a journey worth taking.
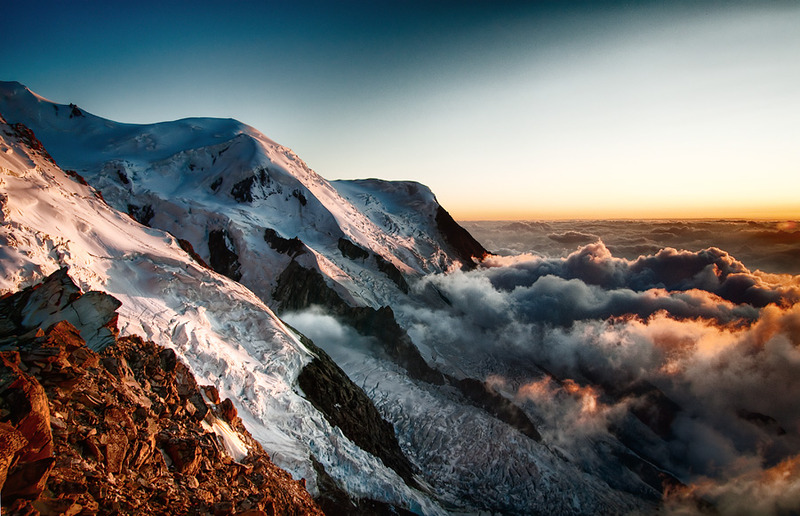
Glacier des Bossons and Dôme du Goûter, below Mont-Blanc,
Chamonix,France
Please send your comments, questions and feedback toab@alexandrebuisse.org.
December, 2009
Alexandre Buisse is a freelance adventure photographer and a mountaineer.
He is the author of Remote Exposure, a guide to hiking and climbing photography,
published in April 2011 by Rocky Nook. He is currently based in the French Alps.
Michael Reichmann is the founder of the Luminous Landscape. Michael passed away in May 2016. Since its inception in 1999 LuLa has become the world's largest site devoted to the art, craft, and technology of photography. Each month more than one million people from every country on the globe visit LuLa.
