Come winter, nothing frustrates photographers more than poor exposures due to extensive amounts of snow in the scene. Here are some ways of dealing with this problem.
 Snow Clad Tress‚ Nevada, 2001
Brightly lit snow is about 1.5 – 2 stops brighter than 18% (medium) gray — which is what your hand-held or built in camera meter expects to see. Therefore, when metering a scene with large expanses of snow the meter (which doesn’t know the difference between water, grass or snow) — simply exposes it as medium gray. Ruined shot.
While we’ve all grown accustomed to the very effective matrix and multi-segment metering in contemporary cameras, not even the best of them can deal with large expanses of bright snow.
The solutions are simple.
Use a hand-held incident light meter
The translucent round ball reads the light falling upon it as if it were an 18% (average) gray subject. Just place the ball in the same light as your subject and the exposure will be spot on.
Adjust your ISO dial
If you set your meter’s or camera’s film speed dial to a 1.5 – 2 stop lower setting the camera will expose properly. (Use ISO 32 instead of 100, for example).
Use your Exposure Compensation Dial
If your camera has one, adjust the setting to about 1.5 – 2 stops of overexposure.
Of course not all snow scenes are created equal sobracketing is a must for critical work. Also in many scenes such as the one above you want the snow to be a bit darker than normal, to show texture, so keep the compensation to not more than 1 or 1.5 stops.
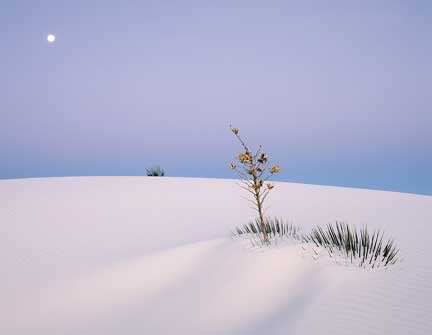 Sand-Moon-Bush‚ White Sands
Pentax 67II and 55~100mm f/4.5 zoom. Provia 100F.
There are situations similar to snow where this technique is also needed. For example, the sand dunes atWhite Sands National Monumentare so white and bright that the same exposure compensation is needed there as is needed when shooting snow .
Michael Reichmann is the founder of the Luminous Landscape. Michael passed away in May 2016. Since its inception in 1999 LuLa has become the world's largest site devoted to the art, craft, and technology of photography. Each month more than one million people from every country on the globe visit LuLa.
You May Also Enjoy...
The Apple iPad and Photographers
For All of UsApple has always been a trend setter. The Apple II wasn't the first home computer, but it defined what one was. With
